How to Use Store.link: A Beginner’s Step-by-Step Guide
Learn how to use Store.link to create a branded bio link page, organize all your important links, and share them across your social media profiles with this beginner-friendly step-by-step guide.
By TechScaleMedia Editorial · Updated July 2026 · 11 min read
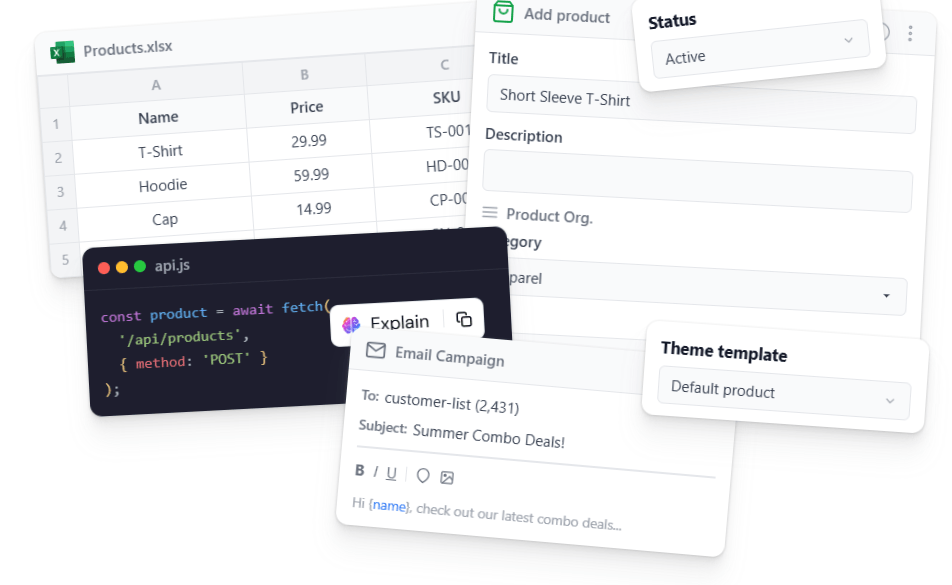
Launching an online store doesn’t have to involve building a complex website or managing complicated e-commerce software. Store.link is a no-code platform that turns a Google Sheet into a fully functional online store, allowing you to manage products, accept payments, and process orders from a familiar spreadsheet.
In this guide, you’ll learn how to use Store.link step by step, from creating your store and adding products to accepting payments, managing orders, and sharing your storefront with customers.
Ready to start selling online? Let’s get started.
How Do You Use Store.link?
Quick Answer
Using Store.link is simple:
- Create a Store.link account.
- Connect a Google Sheet.
- Add your products.
- Customize your store.
- Connect a domain (optional).
- Set up payments.
- Configure order notifications.
- Create discount coupons.
- Manage orders.
- Share your store.
Prerequisites
Before getting started, you’ll need:
- A Store.link account
- A Google account
- A Google Sheet
- Product details and images
- A supported payment provider
- A custom domain (optional)
Step-by-Step Instructions
Follow these simple steps to set up your Store.link page, organize your links, customize your profile, and start sharing all your content from one easy-to-use link.
Step 1: Create a Store.link Account
Sign up for Store.link and choose whether to build your store manually or let AI generate a basic storefront based on a short description of your business.
Step 2: Connect Your Google Sheet
Link an existing Google Sheet or create a new one through Store.link.
Each row represents a product, making it easy to manage your catalog from a spreadsheet.
Step 3: Add Your Products
Enter your product information into the spreadsheet.
Include details such as:
- Product name
- Price
- Description
- Images
- Variants
- Inventory
Review your entries to ensure product information is accurate before publishing.
Step 4: Customize Your Store
Choose a template and personalize your storefront.
You can customize:
- Logo
- Colors
- Fonts
- Homepage content
- Product layout
Select a clean, mobile-friendly design that matches your brand.
Step 5: Connect Your Store URL
Every Store.link account includes a branded store URL.
If your plan supports it, you can also connect a custom domain for a more professional web address.
Step 6: Set Up Payment Methods
Connect a supported payment provider so customers can complete purchases securely.
Available options may include:
- Stripe
- PayPal
- Razorpay
- Square
Before launching, complete a test transaction to confirm your payment setup works correctly.
Step 7: Configure Order Notifications
Choose how you want to receive new order alerts.
Notifications can be sent through:
- Your connected Google Sheet
This helps you respond to customer orders more efficiently.
Step 8: Create Discount Coupons
Create coupon codes to support promotions or special offers.
You can use discounts to:
- Attract new customers
- Reward repeat buyers
- Promote seasonal campaigns
Test coupon codes before sharing them publicly.
Step 9: Manage Orders
Track incoming orders from your Store.link dashboard and update their status as they move through fulfillment.
Keeping order information current helps customers stay informed about their purchases.
Step 10: Share Your Store
Once your store is ready, share your storefront using your branded or custom URL.
Promote it through:
- Social media
- Messaging apps
- Your website
- Online profiles
As you update your spreadsheet, product changes appear automatically in your store.
Tips
Make the most of Store.link by keeping your links organized, regularly updating your content, and customizing your landing page to create a seamless experience for your audience.
- Use clear product names and descriptions.
- Upload high-quality product images.
- Keep pricing and inventory up to date.
- Test your checkout process before launching.
- Organize products consistently within your spreadsheet.
Common Mistakes
- Publishing products with incomplete information.
- Skipping payment testing.
- Using inconsistent product images.
- Forgetting to update inventory.
- Sharing your store before reviewing product details.
Troubleshooting
Products Aren’t Appearing
Check:
- Google Sheet connection
- Spreadsheet formatting
- Sync status
Payments Aren’t Working
Verify:
- Payment provider connection
- Account verification
- Payment settings
Images Aren’t Displaying
Review:
- Image URLs
- File permissions
- Supported formats
Orders Aren’t Showing
Check:
- Notification settings
- Payment completion
- Store synchronization
Best Practices
- Keep your product spreadsheet organized.
- Review your storefront on desktop and mobile devices.
- Update product information regularly.
- Monitor incoming orders daily.
- Refresh product images and descriptions when needed.
Frequently Asked Questions
Do I need coding experience?
No. Store.link is designed for beginners and requires no coding knowledge.
Can I use my own domain?
Yes. Supported paid plans allow you to connect a custom domain.
Which payment providers are supported?
Store.link supports payment providers such as Stripe, PayPal, Razorpay, and Square, depending on your region and subscription.
Can I edit products after publishing?
Yes. Update your connected Google Sheet, and the changes sync automatically to your storefront.
Store.link vs Shopify: Which is better?
Store.link is ideal for individuals and small businesses looking for a simple spreadsheet-based store, while Shopify offers a more comprehensive e-commerce platform with advanced customization and business management features.
Conclusion
Store.link makes it easy to launch an online store by combining Google Sheets with essential e-commerce features in a simple, no-code platform. Whether you’re selling physical products, digital goods, or creator merchandise, you can manage your catalog, accept payments, and process orders without maintaining a traditional online store.
By following this guide, you can set up your storefront, organize your products, configure payments, and start selling with minimal setup.
Get Started with Store.link Today
Start using Store.link today to turn your Google Sheet into a professional online store, simplify product management, and begin selling online without building a traditional e-commerce website.