How to Use Warp Terminal: A Complete Beginner’s Guide to AI-Powered Development
Working in traditional terminals like PowerShell, Bash, or Terminal.app can be frustrating, especially when you have to remember complex commands, troubleshoot cryptic error messages, switch between documentation and your terminal, or repeat the same tasks every day. While modern code editors have embraced AI to improve productivity, most command-line tools have changed very little, leaving developers to rely on manual workflows that slow down development.
By TechScaleMedia Editorial · Updated July 2026 · 11 min read
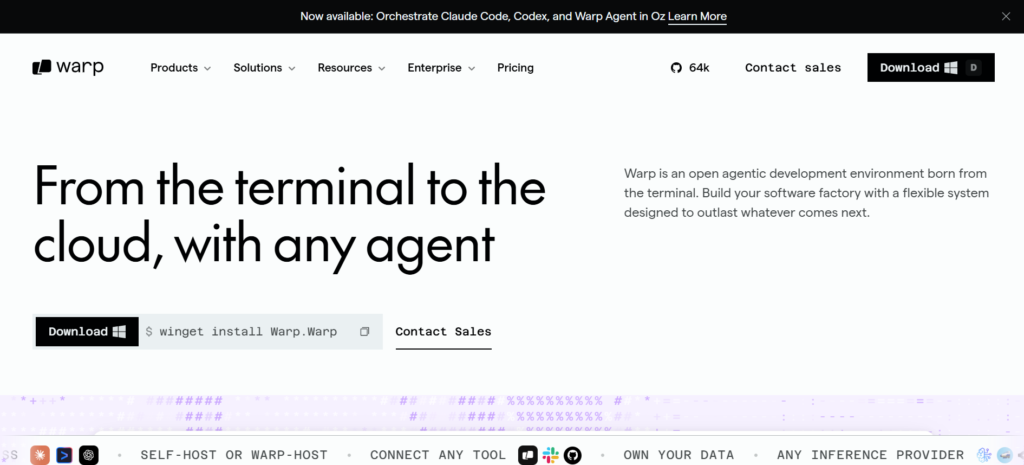
That’s where Warp Terminal comes in. Built with Rust and powered by AI, Warp transforms the traditional terminal into an intelligent development environment that helps you generate commands, explain and fix errors, automate repetitive workflows, collaborate with your team, and even run AI-powered agents—all without leaving the command line. Whether you’re a beginner learning terminal commands or an experienced developer managing complex projects, Warp helps you work faster, reduce mistakes, and stay focused on building software instead of searching for solutions.
If you’re ready to replace your traditional terminal with a faster, AI-powered development environment, follow this step-by-step guide to learn how to use Warp Terminal and unlock its most powerful features. Sign Up Now
Quick Answer
Using Warp Terminal involves installing the application, signing into your Warp account, choosing your preferred shell, and configuring its AI-powered features. Once set up, you can generate terminal commands using natural language, troubleshoot errors with AI assistance, create reusable workflows, connect MCP servers, automate tasks with Cloud Agents, and customize your terminal to match your development workflow—all from one modern, intelligent interface.
Prerequisites
Before installing Warp, make sure you have:
- A Windows, macOS, or Linux computer
- Internet connection
- Administrator permissions
- Basic knowledge of terminal commands
- A Warp account (recommended for AI features)
Create a Workflow Manually (Recommended for Beginners)
If you’re new to automation, building your first workflow by hand is the best way to understand how Pabbly Connect actually works.
Step 1: Check the System Requirements
Before installing Warp Terminal, make sure your computer meets the minimum requirements. Since Warp is built with Rust and uses GPU acceleration for a smooth experience, verifying compatibility first helps prevent installation issues.
Warp is available for Windows, macOS, and Linux, making it a great choice regardless of your preferred operating system.
macOS Requirements
- macOS 10.14 Mojave or later (macOS 12+ recommended)
- Apple Silicon (M1, M2, M3, and M4) or Intel Mac
- Approximately 200 MB of free disk space
Linux Requirements
Warp supports most major Linux distributions, including:
- Ubuntu and Debian (.deb)
- Fedora, RHEL, and SUSE (.rpm)
- Arch Linux (AUR)
- AppImage for other distributions
For the best performance, Warp recommends a GPU with Vulkan or OpenGL 3.3+ support.
Windows Requirements
- Windows 10 (Version 1903 or newer)
- Windows 11
- Native support for both x64 and ARM64 devices
- Compatible with PowerShell, Command Prompt, and Windows Subsystem for Linux (WSL)
Note: You’ll need a free Warp account to complete the initial setup and access AI-powered features.
Step 2: Install Warp Terminal
Installing Warp only takes a few minutes. Choose the installation method that matches your operating system.
Install on macOS
If you use Homebrew, simply run:
brew install –cask warp
Alternatively, download the latest installer from the official Warp website, open the DMG file, and drag Warp into your Applications folder.
Install on Linux
Warp provides installation packages for all major Linux distributions.
Ubuntu and Debian
Add the official Warp repository and install Warp Terminal using the package manager.
sudo apt update
sudo apt install warp-terminal
buntu and Debian
Import the Warp repository and install the package.
sudo dnf install warp-terminal
buntu and Debian
Install Warp directly from the AUR.
yay -S warp-terminal
If your distribution isn’t officially supported, you can also use the AppImage release.
Install on Windows
Download the latest Windows installer from the Warp website.
Run the installer and follow the setup wizard.
Warp automatically integrates with:
- PowerShell
- Command Prompt
- Windows Subsystem for Linux (WSL)
Windows users with ARM64 devices also receive a native version for better performance.
Verify the Installation
After installation finishes, open Warp and verify that everything is working correctly.
Check your active shell:
echo $SHELL
Check the installed Warp version:
warp –version
If both commands work correctly, you’re ready to start using Warp.
Pro Tip: Sign in with your Warp account during setup so your settings, workflows, and AI features sync automatically across devices.
Step 3: Configure Warp Terminal
Now that Warp is installed, spend a few minutes customizing it before you begin working. Proper configuration improves productivity and ensures Warp behaves the way you expect.
Sign In to Your Warp Account
Launch Warp and log into your account.
Signing in unlocks several features, including:
- AI command generation
- Cloud synchronization
- Shared workflows
- Cloud Agents
- Team collaboration
Select Your Preferred Shell
Warp automatically detects the shell installed on your computer.
Supported shells include:
- Bash
- Zsh
- Fish
- PowerShell
- Nushell
Simply choose the one you normally use for development.
Customize the Appearance
Navigate to:
Settings → Appearance
Here you can personalize your workspace by changing:
- Themes
- Font family
- Font size
- Cursor style
- Window transparency
- Terminal colors
A comfortable theme can reduce eye strain during long coding sessions.
Configure Keyboard Shortcuts
Warp includes productivity shortcuts similar to modern code editors.
Some useful shortcuts include:
| Action | macOS | Window/Linux |
|---|---|---|
| Command Palette | Cmd + P | Ctrl + P |
| AI Assistant | Ctrl + ` | Ctrl + ` |
| Search History | Ctrl + R | Ctrl + R |
| New Tab | Cmd + T | Ctrl + T |
| Split Pane | Cmd + D | Ctrl + D |
You can customize any shortcut from Settings → Keybindings.
Enable AI Features
Visit the AI settings page and make sure AI assistance is enabled.
Once activated, Warp can:
- Generate commands from plain English
- Explain terminal errors
- Recommend next commands
- Suggest code fixes
- Help automate repetitive tasks
Configure Shell Integration
Warp automatically integrates with your existing shell configuration.
If you’re using frameworks such as:
- Oh My Zsh
- Starship
- Powerlevel10k
You may need to adjust your configuration to ensure they work smoothly alongside Warp.
Step 4: Explore Warp’s Core Features
With the setup complete, it’s time to explore the features that make Warp different from traditional terminals.
Blocks-Based Output
Unlike traditional terminals that display one long stream of text, Warp organizes every command into its own Block.
Each block includes:
- The command you executed
- Terminal output
- Exit status
- Execution time
This makes it much easier to revisit previous commands, copy outputs, and troubleshoot problems.
Smart Command Search
Warp provides intelligent autocomplete that suggests:
- Commands
- File paths
- Flags
- Previous commands
This helps reduce typing errors and saves time when working with complex CLI tools.
Split Panes
Need to monitor multiple tasks simultaneously?
Warp lets you split your terminal into multiple panes.
For example, you can:
- Run your application in one pane
- Monitor server logs in another
- Execute Git commands in a third
This eliminates the need to constantly switch between terminal windows.
Modern Text Editor Experience
Unlike traditional terminals, Warp’s input area behaves like a modern code editor.
You can:
- Edit multiple lines
- Move the cursor with your mouse
- Undo changes
- Use multiple cursors
- Navigate text easily
These small improvements make writing long commands significantly more comfortable.
Best Practice: Spend a few minutes exploring these core features before moving on to AI tools. Understanding Warp’s interface will make advanced features much easier to use.
Step 5: Use Warp AI and Agent Mode
One of Warp’s biggest advantages is its built-in AI assistant. Instead of searching online for terminal commands or troubleshooting errors manually, you can ask Warp AI to help directly inside the terminal.
Warp organizes its AI capabilities into two powerful features: Active AI and Agent Mode.
Active AI
Active AI works quietly in the background while you use the terminal.
It analyzes your current project, recent commands, shell history, and error messages to provide helpful suggestions in real time.
For example, Active AI can:
- Recommend the next command based on your workflow.
- Explain why a command failed.
- Suggest fixes for compiler or terminal errors.
- Detect Git merge conflicts and propose code changes.
- Offer context-aware command suggestions without interrupting your work.
Because these recommendations appear automatically, you spend less time searching documentation and more time coding.
Agent Mode
Agent Mode is designed for more complex tasks.
Instead of typing individual terminal commands, you simply describe what you want to accomplish in plain English.
Open the AI prompt using Ctrl + ` (or the shortcut configured in your settings), then enter a request such as:
Find all JavaScript files modified in the last 24 hours that are larger than 100 KB.
Warp AI understands your request, generates the appropriate shell command, explains what it does, and lets you review it before running it.
You can also use Agent Mode to:
- Create Git commands
- Generate Docker or Kubernetes commands
- Build shell scripts
- Debug failed deployments
- Search large projects
- Automate repetitive development tasks
Now You’re Ready to Start Using Warp Terminal You’ve successfully installed and configured Warp Terminal and explored its essential features.
Ready to supercharge your command-line workflow with Warp Terminal?
Start using AI-powered commands in minutes and let Warp Terminal handle repetitive development tasks.
Pro Tips to Get the Most Out of Pabbly Connect
Once you’re comfortable with the basics, these tips will help you work faster and get the most value from Warp Terminal.
- Use natural language for AI prompts. Instead of trying to remember complex commands, describe what you want to do in plain English and let Warp generate the appropriate command.
- Review AI-generated commands before running them. This helps you understand what each command does and prevents accidental changes to your system.
- Save repetitive tasks as Workflows. If you regularly build projects, run tests, or deploy applications, create reusable workflows to save time.
- Take advantage of Blocks. Since every command is organized into its own block, bookmark important outputs, copy specific results, and quickly revisit previous commands.
- Customize keyboard shortcuts. Learning shortcuts for the Command Palette, split panes, and AI assistant can significantly improve your productivity.
- Connect MCP servers if your projects require AI to access documentation, databases, or other development tools for more accurate responses.
- Use Cloud Agents to automate long-running tasks such as monitoring deployments, responding to CI/CD events, or handling repetitive workflows.
Pro Tip: Start by using Warp for your everyday Git, Docker, or Node.js tasks. As you become more familiar with the interface, gradually explore advanced features like AI Agents, Workflows, and MCP integrations.
Common Warp Terminal Mistakes to Avoid
New users often make a few common mistakes when using Warp. Avoiding these issues will help you have a smoother experience.
- Running AI Commands Without Reviewing Them. Warp’s AI is highly capable, but you should always review generated commands before execution, especially commands that modify or delete files.
- Ignoring Shell Configuration. If you use custom shell frameworks like Oh My Zsh or Starship, verify they’re properly configured to work with Warp.
- Not Using Workflows. Many users manually repeat the same commands every day instead of creating reusable workflows that automate routine tasks.
- Overlooking Keyboard Shortcuts. Warp includes many productivity shortcuts that can save time. Learning just a few of them can greatly improve your workflow.
- Skipping Updates. Warp regularly introduces new AI capabilities, bug fixes, and performance improvements. Keeping the application updated ensures you have access to the latest features.
Best Practices for Building Reliable Automations
Following these best practices will help you stay productive and avoid common issues.
- Review AI-generated commands before executing them.
- Organize frequently used commands into reusable Workflows.
- Keep Warp and your shell environment updated.
- Use descriptive names when creating workflows.
- Regularly clean up unused workflows and saved resources.
- Take advantage of Blocks to organize terminal output.
- Customize themes and shortcuts for a more comfortable development experience.
- Use AI as a productivity assistant, but continue learning terminal commands to strengthen your command-line skills.
- Secure your account with a strong password and enable additional security features if available.
Troubleshooting Common Pabbly Connect Issues
If you encounter problems while using Warp, try these common solutions before contacting support.
Warp Won’t Launch
- Restart your computer.
- Verify that your operating system meets Warp’s minimum requirements.
- Reinstall the latest version if necessary.
AI Features Are Not Working
- Make sure you’re signed in to your Warp account.
- Check your internet connection.
- Verify that AI features are enabled in the settings.
- Ensure you still have available AI credits if you’re using a metered plan.
Shell Commands Behave Unexpectedly
Confirm that Warp is using your preferred shell, such as Bash, Zsh, Fish, or PowerShell, and check your shell configuration files for conflicts.
MCP Server Connection Fails
Double-check your server configuration, authentication credentials, and network permissions. Restart Warp after making configuration changes if needed.
Cloud Agents Stop Running
Verify that your account has access to Cloud Agents and confirm that the automation workflow or webhook triggering the agent is configured correctly.
Frequently Asked Questions
Is Warp Terminal free?
Yes. Warp offers a free plan with core terminal features and limited AI usage. Paid plans provide higher AI limits and collaboration features.
Which operating systems support Warp?
Warp is available for Windows, macOS, and Linux.
Does Warp work with PowerShell?
Yes. On Windows, Warp supports PowerShell, Command Prompt, and WSL.
Can I use Warp without AI?
Yes. Warp functions as a modern terminal even if you don’t use its AI features.
Is Warp better than a traditional terminal?
If you want AI assistance, reusable workflows, and a modern interface, Warp offers more productivity features than traditional terminals.
Who should use Warp?
Warp is ideal for developers, DevOps engineers, system administrators, and anyone who frequently works from the command line.
Conclusion
Warp Terminal modernizes the command line by combining a familiar shell with AI-powered tools that help you work faster. From generating commands to troubleshooting errors and automating repetitive tasks, it simplifies everyday development without changing how you use the terminal.
Whether you’re a beginner or an experienced developer, Warp can improve your workflow and help you spend less time searching for commands and more time building software.
Try Warp Terminal Today
Ready to improve your command-line workflow? Install Warp Terminal, explore its AI features, and start building faster with a smarter, more productive terminal experience.