How to Use a Water Flosser: A Complete Beginner’s Step-by-Step Guide
Brushing your teeth twice a day is essential, but it doesn’t always remove the food particles and plaque trapped between teeth and below the gumline. Over time, these hard-to-reach areas can contribute to bad breath, gum irritation, and other oral health problems. That’s why many dentists recommend adding a water flosser to your daily routine.
By TechScaleMedia Editorial · Updated July 2026 · 11 min read
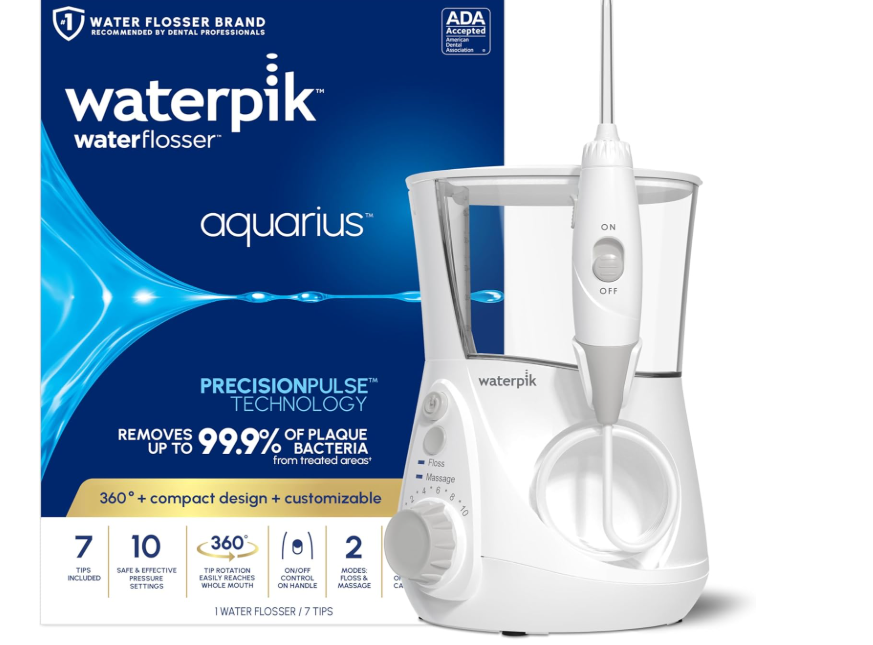
Using a targeted stream of water, this device helps clean places that traditional brushing often misses, making it especially useful for people with braces, dental implants, crowns, bridges, or sensitive gums. If you’ve recently purchased one, you may be wondering how to use it correctly without creating a mess or missing important areas. This beginner-friendly guide walks you through every step, from choosing the right flosser tip and pressure setting to cleaning and maintaining the device.
By the end, you’ll know how to use a water flosser safely, effectively, and confidently as part of a healthier daily oral care routine.
How Do You Use a Water Flosser?
Quick Answer
- Fill the water reservoir with lukewarm water.
- Attach the appropriate flosser tip.
- Select a comfortable pressure setting.
- Lean over the sink.
- Close your lips slightly to reduce splashing.
- Start from the back teeth and follow the gumline.
- Aim the tip at a 90-degree angle.
- Clean every tooth on both upper and lower arches.
- Empty and rinse the reservoir after use.
- Clean and recharge the device regularly.
Prerequisites
Before you begin, you’ll need:
- Water flosser device
- Lukewarm water
- Optional diluted mouthwash
- Appropriate flosser tip
- Sink with mirror
- Clean towel
- Charger (for cordless water flosser models)
Create a Workflow Manually (Recommended for Beginners)
If you’re new to oral care devices, using your first Water Flosser is the best way to understand how the product actually works.
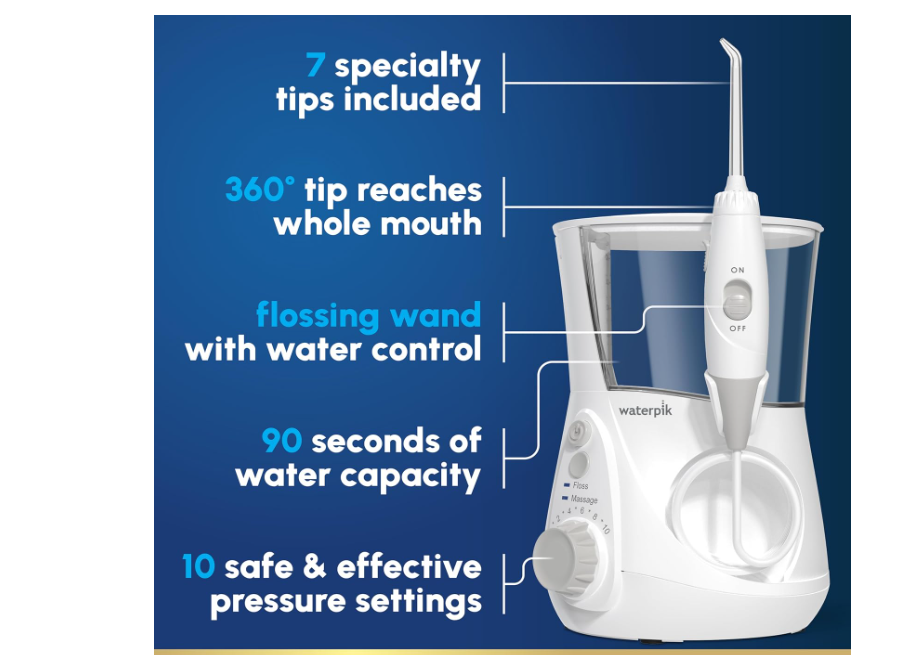
Step 1: Fill the Water Reservoir
Remove the reservoir and fill it with lukewarm water.
Avoid using hot water, as it may be uncomfortable for your gums and could damage some water flosser components.
Some users prefer adding a small amount of alcohol-free mouthwash mixed with water for extra freshness.
Step 2: Choose the Right Flosser Tip
Attach the tip that matches your dental needs.
Common attachments include:
- Standard jet tip for everyday cleaning
- Orthodontic flosser tip for braces
- Plaque seeker tip for implants, crowns, and bridges
- Tongue cleaner attachment for fresh breath
Using the proper attachment helps improve cleaning efficiency.
Step 3: Select the Pressure Setting
If you’re new to using a portable oral irrigator, begin with the lowest pressure.
As your gums become accustomed to the water stream, gradually increase the pressure until it feels both comfortable and effective.
People with sensitive gums should avoid starting on the highest setting.
Step 4: Lean Over the Sink
Position yourself over the sink before turning on the device.
This prevents water from splashing onto your clothing or bathroom counter.
Keep the device upright if recommended by the manufacturer.
Step 5: Close Your Lips Slightly
Close your lips enough to minimize splashing while allowing water to flow naturally into the sink.
Avoid completely sealing your lips, as water needs an escape path.
Step 6: Turn On the Water Flosser
Begin with the back teeth.
Move slowly along the gumline and pause briefly between each tooth.
Allow the pressurized water stream cleaning action to flush away food particles and plaque.
Step 7: Angle the Tip Correctly
Hold the tip at approximately a 90-degree angle toward the gumline.
Aim between the teeth and slightly beneath the gum margin without forcing the tip into the gums.
Proper positioning helps maximize plaque removal while protecting gum tissue.
Step 8: Clean Your Entire Mouth
Systematically clean:
- Upper teeth (front and back)
- Lower teeth (front and back)
- Inside surfaces
- Outside surfaces
- Around braces, implants, or bridges if applicable
Most cleaning sessions take about one to two minutes.
Step 9: Rinse the Tip
After finishing, briefly run clean water through the device.
This helps remove leftover debris and mouthwash residue from the tubing and nozzle.
Step 10: Empty and Dry the Reservoir
Discard any remaining water.
Leave the tank open to air dry completely.
This helps prevent mold, bacteria, and mineral buildup inside the reservoir.
Step 11: Recharge or Replace Batteries
For a cordless water flosser, recharge the battery according to the manufacturer’s recommendations.
Keeping the battery fully charged helps maintain consistent water pressure during each use.
Ready to improve your oral care?
Follow the steps below to get the best results from your water flosser and make it a simple, effective part of your everyday dental care.
How Can You Use a Water Flosser More Efficiently?
Tips
Use the Water Flosser at the Same Time Each Day
Building a consistent routine, such as using it before brushing each evening, makes it easier to maintain good oral hygiene.
Rotate the Tip as You Move
Turn the nozzle slightly as you move around each tooth to keep the water stream directed at the gumline and between teeth.
Replace the Water Frequently
If the reservoir empties before you finish, refill it with fresh water rather than reusing old water.
Keep the Device Upright
Holding the water flosser in the recommended position helps maintain steady water pressure and prevents interruptions during use.
Travel With a Cordless Model
If you travel often, keep a portable cordless water flosser charged and packed to maintain your oral care routine away from home.
How Can You Avoid Common Water Flosser Errors?
Common Mistakes
Skipping Hard-to-Reach Areas
Many users focus only on the front teeth and forget to clean behind the back molars or along the inside surfaces.
Holding the Tip Too Far From the Teeth
Keeping the nozzle too far away reduces cleaning effectiveness. Position it close to the gumline without touching the gums forcefully.
Using a Dirty Reservoir
Failing to clean the reservoir regularly can lead to mineral deposits, bacteria, and unpleasant odors.
Not Replacing Worn Tips
Overused tips may become less effective. Replace them according to the manufacturer’s recommended schedule.
Rushing Through the Process
Moving too quickly from tooth to tooth limits the water’s ability to remove plaque and trapped food particles.
How Can You Get the Most Value from a Water Flosser?
Best Practices
Follow a Consistent Cleaning Pattern
Always clean your teeth in the same order—for example, upper teeth first, then lower teeth—to avoid missing areas.
Store the Device Properly
Keep your water flosser in a clean, dry place with the reservoir empty and the lid open when possible to promote airflow.
Inspect the Device Regularly
Check the hose, nozzle, seals, and reservoir for signs of wear or damage to ensure reliable performance.
Descale the Unit Periodically
If you live in an area with hard water, remove mineral buildup using the manufacturer’s recommended cleaning solution to keep the pump working efficiently.
Replace the Device When Necessary
If the motor becomes weak, the reservoir cracks, or leaks persist despite maintenance, replacing the unit may provide better cleaning performance and reliability.
How Can You Troubleshoot Water Flosser Effectively?
Troubleshooting
My Water Flosser Is Leaking
Check:
- Reservoir seal
- Water tank connection
- Tip attachment
- Cracks in the reservoir
Replace damaged seals if necessary.
Water Pressure Feels Weak
Possible causes include:
- Low battery
- Mineral buildup
- Clogged nozzle
- Low water level
Clean the device regularly and recharge the battery.
The Tip Keeps Falling Off
Ensure the tip clicks securely into place.
Replace worn attachments if they no longer lock properly.
The Reservoir Has Mold
Wash the tank with warm soapy water.
Periodically clean it using a manufacturer-approved vinegar solution or descaling method.
Allow the reservoir to dry completely after every use.
Battery Drains Quickly
Check:
- Battery charge
- Power cable
- Charging contacts
- Power button
Recharge the unit fully before troubleshooting further.
Frequently Asked Questions
Is a water flosser better than regular floss?
A water flosser can be highly effective at removing debris and improving gum health, especially for people with braces, implants, or sensitive gums. Traditional floss is still recommended by many dental professionals because it physically scrapes plaque from tooth surfaces. Many people benefit from using both.
How often should you use a water flosser?
Most dentists recommend using a water flosser once daily, preferably before brushing your teeth.
What is the best water flosser for braces?
Models that include an orthodontic flosser tip are ideal because they clean around brackets and wires more effectively than standard tips.
Which pressure setting is best for sensitive gums?
Start with the lowest pressure and gradually increase it as your gums become comfortable. Sensitive gums generally respond best to lower or medium pressure settings.
How do I clean a water flosser reservoir?
Empty the tank after every use, rinse it thoroughly, and allow it to air dry. Clean it weekly using warm soapy water or a manufacturer-approved cleaning solution to prevent mold and mineral buildup.
Conclusion
A water flosser is an easy-to-use tool that can significantly improve your daily oral hygiene when used correctly. By following the proper technique, choosing the right attachment, and using an appropriate pressure setting, you can remove food debris and plaque from areas that brushing alone may not reach.
Regular cleaning and maintenance of the device also help ensure consistent performance and long-term reliability. Whether you have braces, dental implants, sensitive gums, or simply want a more thorough cleaning routine, making water flossing a daily habit can support healthier gums, fresher breath, and a cleaner smile. Use this guide as your reference until the process becomes second nature, and you’ll be well on your way to better oral health.
Improve Your Oral Care Routine Today
Start using your water flosser the right way to achieve cleaner teeth and healthier gums. Follow this step-by-step guide, choose the proper attachments, maintain your device regularly, and make water flossing part of your daily dental care routine for long-lasting oral health.