How to Use a Portable Gaming Monitor (144Hz+ USB-C): A Complete Beginner’s Step-by-Step Guide
A Portable Gaming Monitor (144Hz+ USB-C) is a slim, lightweight external display designed for gamers, remote workers, content creators, and professionals who need an extra screen wherever they go. With a high refresh rate monitor and single-cable USB-C display connectivity, it delivers smoother gameplay, improved productivity, and a convenient dual-screen experience without the bulk of a traditional monitor.
By TechScaleMedia Editorial · Updated July 2026 · 11 min read
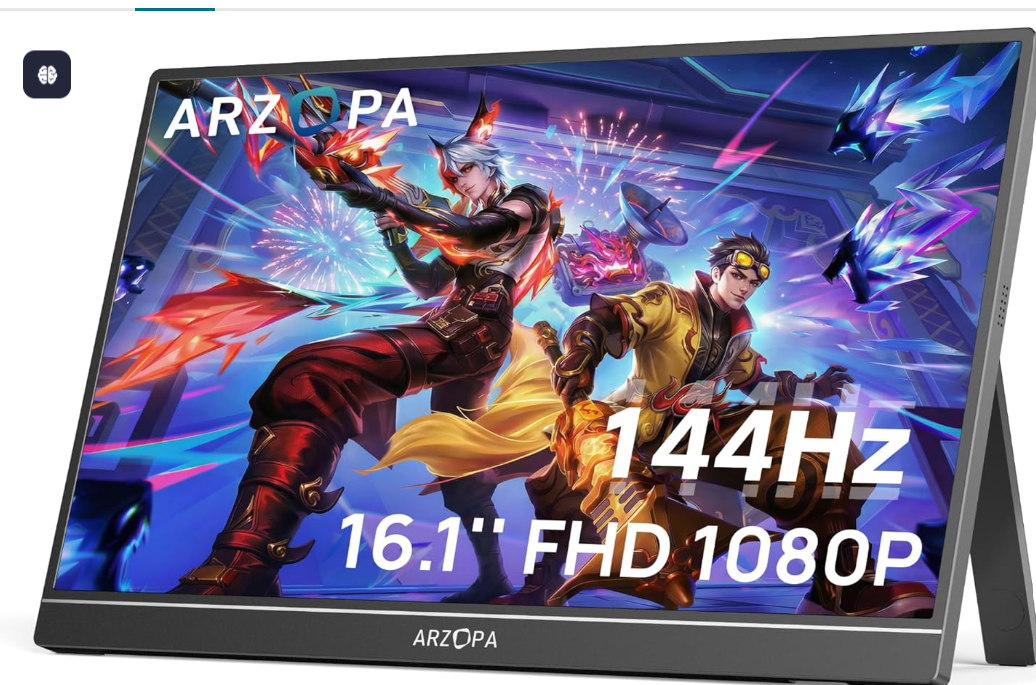
These monitors work with compatible laptops, gaming consoles, smartphones, and handheld gaming devices, making them ideal for on-the-go gaming setups, travel, and mobile workstations. Whether you’re expanding your workspace or enjoying high-refresh-rate gaming away from home, proper setup ensures the best performance and image quality.
This guide explains how to set up a portable gaming monitor, connect it using USB-C or HDMI, configure display settings, enable FreeSync/G-Sync compatibility, troubleshoot common issues, and optimize your experience.
How Do You Use a Portable Gaming Monitor?
Quick Answer
- Attach the folio stand or protective cover.
- Connect the monitor via USB-C or HDMI.
- Power the monitor if required.
- Adjust the display settings.
- Set the refresh rate to 144Hz or higher.
- Enable Adaptive Sync if supported.
- Position the monitor comfortably.
- Calibrate colors if needed.
- Pack the monitor safely after use.
Prerequisites
Before you begin, you’ll need:
- Portable gaming monitor (144Hz+)
- USB-C cable
- HDMI cable (if required)
- USB power adapter (if needed)
- Laptop, gaming console, smartphone, or compatible device
- Stable desk or flat surface
Create a Workflow Manually (Recommended for Beginners)
If you’re new to portable displays, using your first Portable Gaming Monitor is the best way to understand how the technology actually works.
Step 1: Set Up the Stand
Unfold the included folio cover or built-in stand.
Place the monitor on a stable surface and adjust the viewing angle until the screen is comfortable to see.
Step 2: Connect Using USB-C
Connect the monitor to your compatible device using a USB-C cable.
Many USB-C displays support video, audio, and power through a single cable, reducing cable clutter.
Wait a few moments for the monitor to detect the signal automatically.
Step 3: Use HDMI if Needed
If your device does not support USB-C video output, connect the monitor using an HDMI cable.
Some devices also require a separate USB connection to provide power to the monitor.
Step 4: Power the Monitor
If the connected device cannot supply enough power through USB-C, plug the monitor into its included USB power adapter.
Verify that the power indicator lights up before continuing.
Step 5: Adjust Display Settings
Open the On-Screen Display (OSD) menu using the monitor’s control buttons.
Adjust settings such as:
- Brightness
- Contrast
- Color temperature
- Picture mode
- Volume (if speakers are included)
Choose settings that match your environment and usage.
Step 6: Set the Refresh Rate
Open your computer or console display settings.
Select the monitor and change the refresh rate to 144Hz or the highest supported value.
Simply owning a 144Hz external screen does not automatically enable the higher refresh rate.
Step 7: Enable Adaptive Sync
If supported, enable FreeSync or G-Sync compatibility in your graphics card settings.
Adaptive Sync helps reduce:
- Screen tearing
- Stuttering
- Input lag
This provides smoother gameplay during fast-moving scenes.
Step 8: Position the Monitor
Place the monitor beside your primary display for a dual-screen gaming laptop setup or directly in front of you when gaming on the go.
Adjust the viewing angle to reduce glare and maintain comfortable eye level.
Step 9: Calibrate Colors (Optional)
For photo editing, video production, or graphic design, fine-tune color settings using the OSD menu or calibration software.
This helps improve color accuracy for professional work.
Step 10: Pack for Travel
Disconnect all cables.
Fold the protective cover over the screen before placing the monitor inside your laptop bag or carrying case.
Proper storage helps protect the display during travel.
Ready to enjoy smoother gameplay and a more flexible workspace?
Follow this step-by-step guide to set up your portable gaming monitor correctly and get the most from its high refresh rate and portable design.
How Can You Use a Portable Gaming Monitor More Efficiently?
Tips
Use a Certified High-Speed Cable
A quality USB-C or HDMI cable helps maintain a stable signal, especially when using high resolutions and refresh rates
Match the Display to Your Task
Switch between gaming, movie, or standard picture modes to get the best image quality for different activities.
Keep the Monitor on a Stable Surface
A firm, level surface prevents movement and provides a better viewing experience.
Manage Screen Brightness
Lower the brightness indoors to reduce eye fatigue and extend battery life on connected portable devices.
Carry Essential Accessories
Keep the required cables, power adapter, and a cleaning cloth in your laptop bag so your monitor is always ready to use.
How Can You Avoid Common Portable Gaming Monitor Errors?
Common Mistakes
Assuming Every USB-C Port Supports Video
Some USB-C ports only transfer data or charge devices. Verify your device supports DisplayPort Alt Mode or Thunderbolt.
Leaving the Refresh Rate at the Default Setting
Many systems default to 60Hz, so manually select the highest supported refresh rate in your display settings.
Ignoring Power Requirements
If the source device cannot provide enough power, the monitor may flicker or fail to turn on.
Using Unsupported Resolutions
Selecting a resolution beyond your monitor’s capabilities can reduce performance or cause display issues.
Handling the Screen Carelessly
Pressing directly on the display or placing heavy objects on it can damage the panel during daily use or travel.
How Can You Get the Most Value from a Portable Gaming Monitor?
Best Practices
Update Firmware and Graphics Drivers
Keeping both your monitor and graphics drivers updated improves compatibility, stability, and overall performance.
Use the Native Resolution
Running the display at its recommended resolution delivers the sharpest image and the best visual experience.
Clean the Screen Properly
Use a microfiber cloth and screen-safe cleaner to remove dust and fingerprints without scratching the display.
Store the Monitor in a Protective Case
Protect the screen from impacts and scratches by using the included folio cover or a padded carrying sleeve.
Check Cable Connections Regularly
Inspect cables and connectors for wear to maintain a reliable connection and prevent unexpected display interruptions.
How Can You Troubleshoot Portable Gaming Monitor Effectively?
Troubleshooting
Monitor Shows No Signal
Reconnect the cable.
Verify that the correct input source is selected and that your device supports video output.
Refresh Rate Is Limited to 60Hz
Check your device’s display settings.
Use a cable that supports higher refresh rates and confirm both the monitor and graphics hardware support 144Hz.
Monitor Keeps Turning Off
Ensure the monitor is receiving sufficient power.
Connect the external power adapter if USB-C power alone is insufficient.
Screen Flickering During Gaming
Enable Adaptive Sync if supported.
Update your graphics drivers and check cable connections.
Colors Look Incorrect
Reset the monitor’s picture settings or recalibrate the display using the OSD menu.
Frequently Asked Questions
How do I set up a portable gaming monitor?
Connect the monitor using USB-C or HDMI, provide power if needed, adjust the display settings, and set the correct refresh rate in your device’s display options.
Is a 144Hz portable monitor worth it?
Yes. A 144Hz monitor provides smoother motion and a more responsive gaming experience compared to a standard 60Hz display.
Can I connect a portable monitor to a PS5 or Nintendo Switch?
Yes. Most portable monitors support HDMI connections for gaming consoles, while some handheld devices also support USB-C video output.
What is the difference between HDMI and USB-C?
USB-C can carry video, audio, and power through a single cable on compatible devices, while HDMI transfers video and audio but usually requires separate power.
Why is my portable monitor not displaying 144Hz?
Your device, cable, graphics hardware, or display settings may not support the selected refresh rate. Verify that all components are compatible.
Does FreeSync work on portable gaming monitors?
Many modern portable gaming monitors support FreeSync, and some are also compatible with G-Sync when used with supported graphics cards.
Conclusion
A Portable Gaming Monitor (144Hz+ USB-C) is an excellent solution for anyone who wants a lightweight second screen for gaming, work, or travel. By connecting the monitor correctly, selecting the proper refresh rate, enabling Adaptive Sync, and optimizing your display settings, you can enjoy smoother gameplay and a more productive workspace wherever you go.
Whether you’re building a travel gaming setup, creating a dual-screen workstation, or connecting a gaming console, proper setup helps you get the best performance from your portable monitor.
Take Your Gaming Anywhere
Set up your Portable Gaming Monitor (144Hz+ USB-C) today and enjoy smoother visuals, flexible dual-screen productivity, and high-performance gaming wherever you are. Configure it correctly to unlock its full potential at home, in the office, or on the go.