How to Use an Ergonomic Split Keyboard: A Complete Beginner’s Step-by-Step Guide
An ergonomic split keyboard is designed to improve typing comfort by separating the keyboard into two halves, allowing your hands, wrists, and shoulders to rest in a more natural position. Unlike a standard keyboard that forces your hands inward, a split keyboard helps maintain a neutral wrist position, reducing strain during long typing sessions.
By TechScaleMedia Editorial · Updated July 2026 · 11 min read
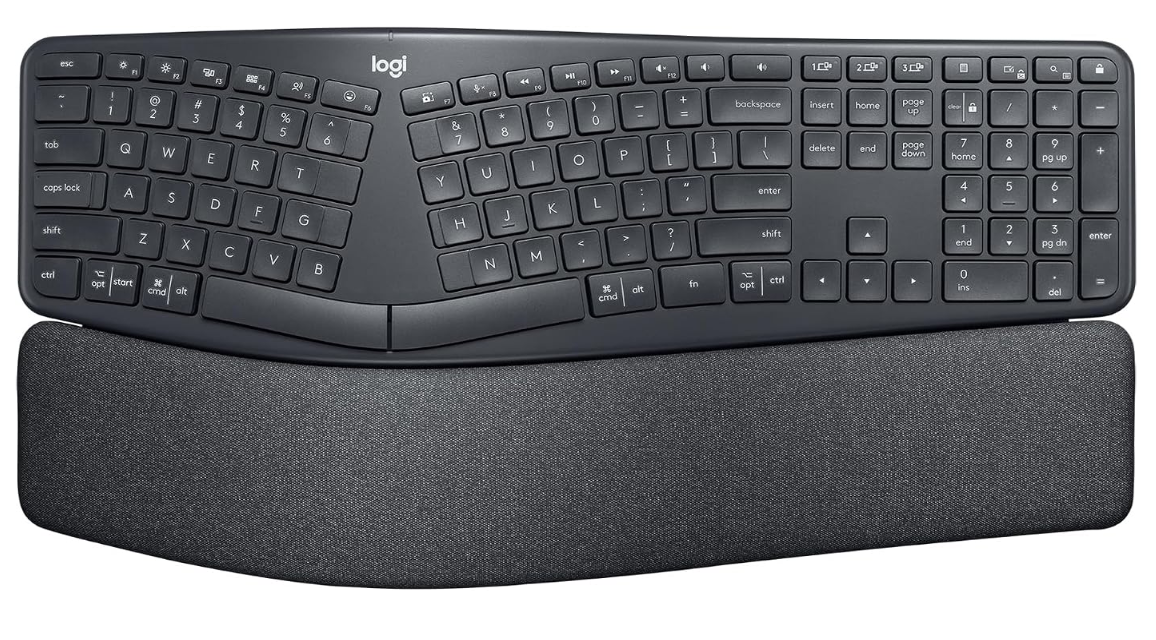
These keyboards are popular among programmers, writers, office professionals, remote workers, and anyone looking to improve desk ergonomics or reduce discomfort caused by repetitive typing. While switching from a traditional keyboard may feel unusual at first, proper setup and a short adjustment period can significantly improve comfort and typing posture.
This guide explains how to use a split ergonomic keyboard, including positioning the keyboard, adjusting the keyboard tenting angle, customizing programmable features, troubleshooting common issues, and following best ergonomic practices.
How Do You Use an Ergonomic Split Keyboard?
Quick Answer
- Position the keyboard halves shoulder-width apart.
- Connect the keyboard to your computer.
- Adjust the tenting or tilt angle.
- Set the correct desk and keyboard height.
- Practice proper finger placement.
- Customize programmable keyboard layers (if available).
- Add wrist rests for additional support.
- Take regular stretching breaks.
- Keep firmware and companion software updated.
Prerequisites
Before you begin, you’ll need:
- Ergonomic split keyboard
- USB cable, Bluetooth, or wireless receiver
- Computer or compatible device
- Keyboard companion software (if programmable)
- Wrist rests (optional)
- Adjustable desk or keyboard tray (recommended)
Create a Workflow Manually (Recommended for Beginners)
If you’re new to ergonomic keyboards, using your first Ergonomic Split Keyboard is the best way to understand how the design actually works.
Step 1: Position the Keyboard Halves
Place each keyboard half approximately shoulder-width apart.
Keep your elbows relaxed at your sides while allowing your wrists to remain straight instead of bending inward.
Most users gradually adjust the spacing until they find the most comfortable natural typing posture.
Step 2: Connect the Keyboard
Connect your keyboard using the supported connection method:
- USB cable
- Bluetooth
- Wireless USB receiver
Allow your operating system to detect and install the keyboard automatically before typing.
Step 3: Adjust the Tenting Angle
If your keyboard supports keyboard tenting angle adjustment, raise the inner edges of both halves.
Tenting helps reduce wrist pronation, allowing your forearms to rest in a more natural position.
Start with a small angle and increase it gradually until typing feels comfortable.
Step 4: Set the Proper Keyboard Height
Position your keyboard so your forearms remain nearly parallel to the floor.
A keyboard tray or adjustable desk can help maintain a comfortable neutral wrist position typing setup while reducing shoulder tension.
Avoid placing the keyboard too high, as this may increase wrist extension.
Step 5: Retrain Your Finger Placement
Moving from a traditional keyboard to a column-staggered keyboard or split layout requires practice.
Focus on:
- Home-row positioning
- Light finger movements
- Looking at the screen instead of the keyboard
The split keyboard adjustment period usually lasts from several days to a few weeks depending on your typing habits.
Step 6: Customize Keyboard Layout
If your keyboard is programmable, install the manufacturer’s keyboard companion software.
You can customize:
- Key remapping
- Shortcuts
- Programmable keyboard layers
- Function keys
- Macros
Creating personalized layouts can improve both productivity and comfort.
Step 7: Add Wrist Rests
Use a wrist rest accessory that matches the height of your keyboard.
A wrist rest should gently support your palms during pauses—not while actively typing.
Proper support helps reduce fatigue during long work sessions.
Step 8: Take Regular Breaks
Even the best ergonomic split keyboard cannot eliminate strain caused by continuous typing.
Every 30–60 minutes:
- Stretch your fingers
- Roll your shoulders
- Relax your wrists
- Stand and walk briefly
These habits support repetitive strain injury prevention and improve overall comfort.
Step 9: Update Firmware and Software
If your keyboard includes programmable features, regularly check for updates.
Firmware updates may improve:
- Compatibility
- Stability
- Key responsiveness
- Software performance
- Feature support
Ready to upgrade your typing comfort?
Follow these steps to create a healthier workspace and enjoy a more comfortable typing experience.
How Can You Use a Ergonomic Split Keyboard More Efficiently?
Tips
Start With a Small Split Distance
Position the keyboard halves slightly apart at first, then gradually increase the distance until your arms feel relaxed.
Practice in Short Sessions
Use the keyboard for 20–30 minutes at a time during the first few days to build muscle memory without frustration.
Learn Keyboard Shortcuts
Using shortcuts reduces unnecessary hand movement and improves productivity on a split keyboard.
Customize Your Layout
Remap frequently used keys or create layers to make repetitive tasks faster and more comfortable.
Keep Your Workspace Organized
Ensure your mouse, monitor, and keyboard are positioned comfortably so you don’t have to reach or twist while working.
How Can You Avoid Common Ergonomic Split Keyboard Errors?
Common Mistakes
Switching Back Too Often
Frequently alternating between a split keyboard and a standard keyboard can slow the learning process.
Separating the Keyboard Too Far
Placing the halves excessively wide may strain your shoulders instead of improving comfort.
Applying Too Much Force While Typing
Heavy keystrokes increase finger fatigue. A light typing touch is more efficient and comfortable.
Ignoring Custom Features
Leaving programmable keys and layers unused means missing productivity and ergonomic benefits.
Expecting Immediate Results
Most users need time to adjust before typing speed and accuracy return to normal.
How Can You Get the Most Value from a Ergonomic Split Keyboard?
Best Practices
Reassess Your Setup Periodically
As you become more comfortable, fine-tune the keyboard spacing, angle, and layout to match your workflow.
Create Separate Profiles for Different Tasks
Use different key layouts for coding, writing, gaming, or office work if your keyboard supports profiles.
Keep Software and Firmware Updated
Install updates to maintain compatibility, improve stability, and access new features.
Clean the Keyboard Regularly
Remove dust and debris from between the keys to keep the keyboard functioning smoothly.
Listen to Your Body
If discomfort continues despite proper setup, adjust your workspace or consult an ergonomic specialist to identify other contributing factors.
How Can You Troubleshoot Ergonomic Split Keyboard Effectively?
Troubleshooting
My Typing Feels Slower
This is normal during the adjustment period.
Practice daily for short sessions until muscle memory develops.
My Wrists Still Hurt
Check:
- Keyboard height
- Chair height
- Tenting angle
- Wrist position
Avoid bending your wrists while typing.
Keyboard Is Not Recognized
Reconnect the USB cable or wireless receiver.
Restart your computer and install the latest keyboard drivers or companion software if required.
Bluetooth Connection Keeps Dropping
Recharge the battery.
Reconnect the Bluetooth pairing.
Move away from sources of wireless interference.
Custom Shortcuts Are Not Working
Open the keyboard companion software.
Verify the active profile and reapply your custom layout if necessary.
Frequently Asked Questions
Does a split keyboard help carpal tunnel?
It may improve wrist positioning and reduce stress on your hands, which can help many users. However, it is not a medical treatment, and persistent pain should be evaluated by a healthcare professional.
How long is the split keyboard adjustment period?
Most users adapt within one to three weeks, depending on their typing habits and daily usage.
What is the best tenting angle for ergonomic keyboards?
A slight tenting angle is a good starting point. Increase it gradually until you find the most comfortable position.
Can I use a split keyboard for gaming?
Yes. Many users game on split keyboards, although it may take some time to adapt to the different key layout.
Is a split keyboard better than a regular keyboard?
A split keyboard can offer better ergonomics and comfort for long typing sessions, while a regular keyboard may feel more familiar. The best choice depends on your comfort, typing habits, and workspace setup.
Conclusion
An ergonomic split keyboard is an excellent investment for anyone who spends hours typing each day. By positioning the keyboard correctly, adjusting the keyboard tenting angle, maintaining a neutral wrist position, and using programmable keyboard layers when available, you can create a more comfortable and efficient workspace.
Although there is a short learning curve, consistent practice and proper desk ergonomics can help reduce wrist strain, improve posture, and support long-term typing comfort for work, study, or remote office use.
Improve Your Typing Comfort Today
Set up your ergonomic split keyboard using these best practices and enjoy a healthier, more comfortable typing experience. Fine-tune your workspace, customize your keyboard, and build better habits to reduce wrist strain and boost productivity over the long term.